SIZES X-SMALL SMALL MEDIUM LARGE XX-LARGE
Because of the differences in hand thickness, hand length and wrist diameter, there are no given dimensions that that can be used. The size you need to order is the same size you would use when buying a pair of work gloves. This may sound unorthodox but it has worked very well for thirty five years, correct 99% of the time. If you think your hand borders between sizes go to the smaller size. The fit should be tight rather than loose and the glove will adjust itself as it forms to your hand.
Many shooters for cold weather buy an extra glove one size up. All gloves and mechanisms are interchangeable. The mechanism comes off easily using a 3/32 allen wrench.
*** IF YOU THINK YOU NEED AN X-LARGE, 99% of the time you will still need a size LARGE. The XX-LARGE - Should be considered XX and a special order for extremely large hands or to be used over a typical size large hand wearing a thick cold weather glove
*** Use this link for more information on XX-Large.
Most of us can look at our hands and say what size it is without thinking about it. Common sense prevails and a little comparison to another person's hand may help you to decide.
-------------------------------------------------------------------------------------------------------------------
X-SMALL – Child's hand usually through ten years. If the Child's hand is at all above average for the age go to size SMALL. X-SMALL is for the very small hand.
SMALL - Normally fits an average size lady's hand or a juvenile's hand that is still growing.
MEDIUM - Average to small man's hand or large lady's hand.
LARGE - Large to extra large man's hand or medium sized hand over a cold weather glove.
XX-LARGE - Very large hand or to be used over a thick cold weather glove on a large hand.
-------------------------------------------------------------------------------------------------------------------
Wondering what size of old glove you have?
Find the tabs of leather that go ahead out past the slot where the mechanism attaches to the glove. One is on top of the mechanism, one is underneath behind the trigger about a 1/4" long. If they both come to a point and the top tab is larger than the bottom it is a large. If they are rounded and both the same size, it is a medium. The large description is for gloves sold before 2010. Since 2010 the large has same style tabs as the rest but can be designated be the flat straight cut under the buckle, the older gloves were rounded under the buckle. The tabs on the X-large gloves are still the same, uneven in size and come to a point. The difference in the X-Small, Small, and X-Large are obvious.
Use this link to view the differences in size and shape. Notice the tabs on the X-large gloves, the old large glove had tabs that are identical to these.
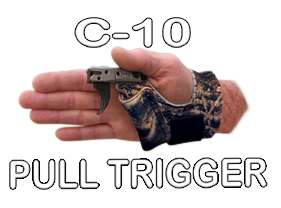
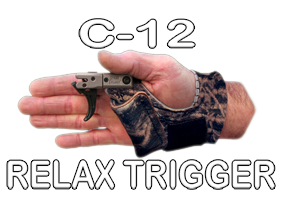
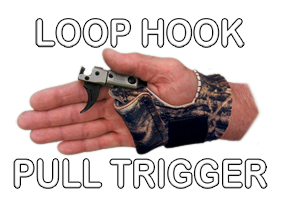
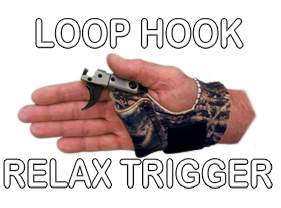
The C-10 and Loop hook pull triggers are adjustable for travel. The relax triggers are not adjustable as the trigger pull is a constant, actually the shot is made before you have a sense of it happening. If you had to put a weight on the relax trigger shot it would be a negative 4 - 8 ounces.
The pull trigger models are shipped with maximum trigger travel. It is not made for a "hair" trigger. Contrary to popular belief, you need to feel resistance. A hair trigger will only get you in trouble, and it will not fix the flinch that you are trying to avoid. It is recommended you give it at least a hundred shots before adjustments, this allows the sears to seat themselves.
To adjust look at the front of the mechanism find the hole in the top of the trigger. There are two set screws tightened down on each other to prevent them from jarring loose. Take the first one out and turn the inside screw clockwise to lighten and shorten the travel. Notice the screw going through and making contact with the case. Watch the trigger move as you turn the set screw in, it is putting the sears closer to their separation. At this point use "VERY" small increments, testing the trigger to make sure there is enough sear to hold it before making a draw. Put in the second set screw and snug the two of them together. To keep them both from turning in while tightening, push the trigger forward keeping pressure on it. This pushes the first screw against the case wall securing its position.
*Readjust trigger periodically as time will change the trigger action.
*It is advised that you send out at least a hundred arrows before you adjust the trigger travel, this is needed to seat the sears.
*To engage the C-10 without making a click sound, pull and hold the trigger, letting go after the serving is engaged in the slot. To close the Loop Hook quietly, push mechanism into any surface of your clothing, releasing the trigger to lock it up.
